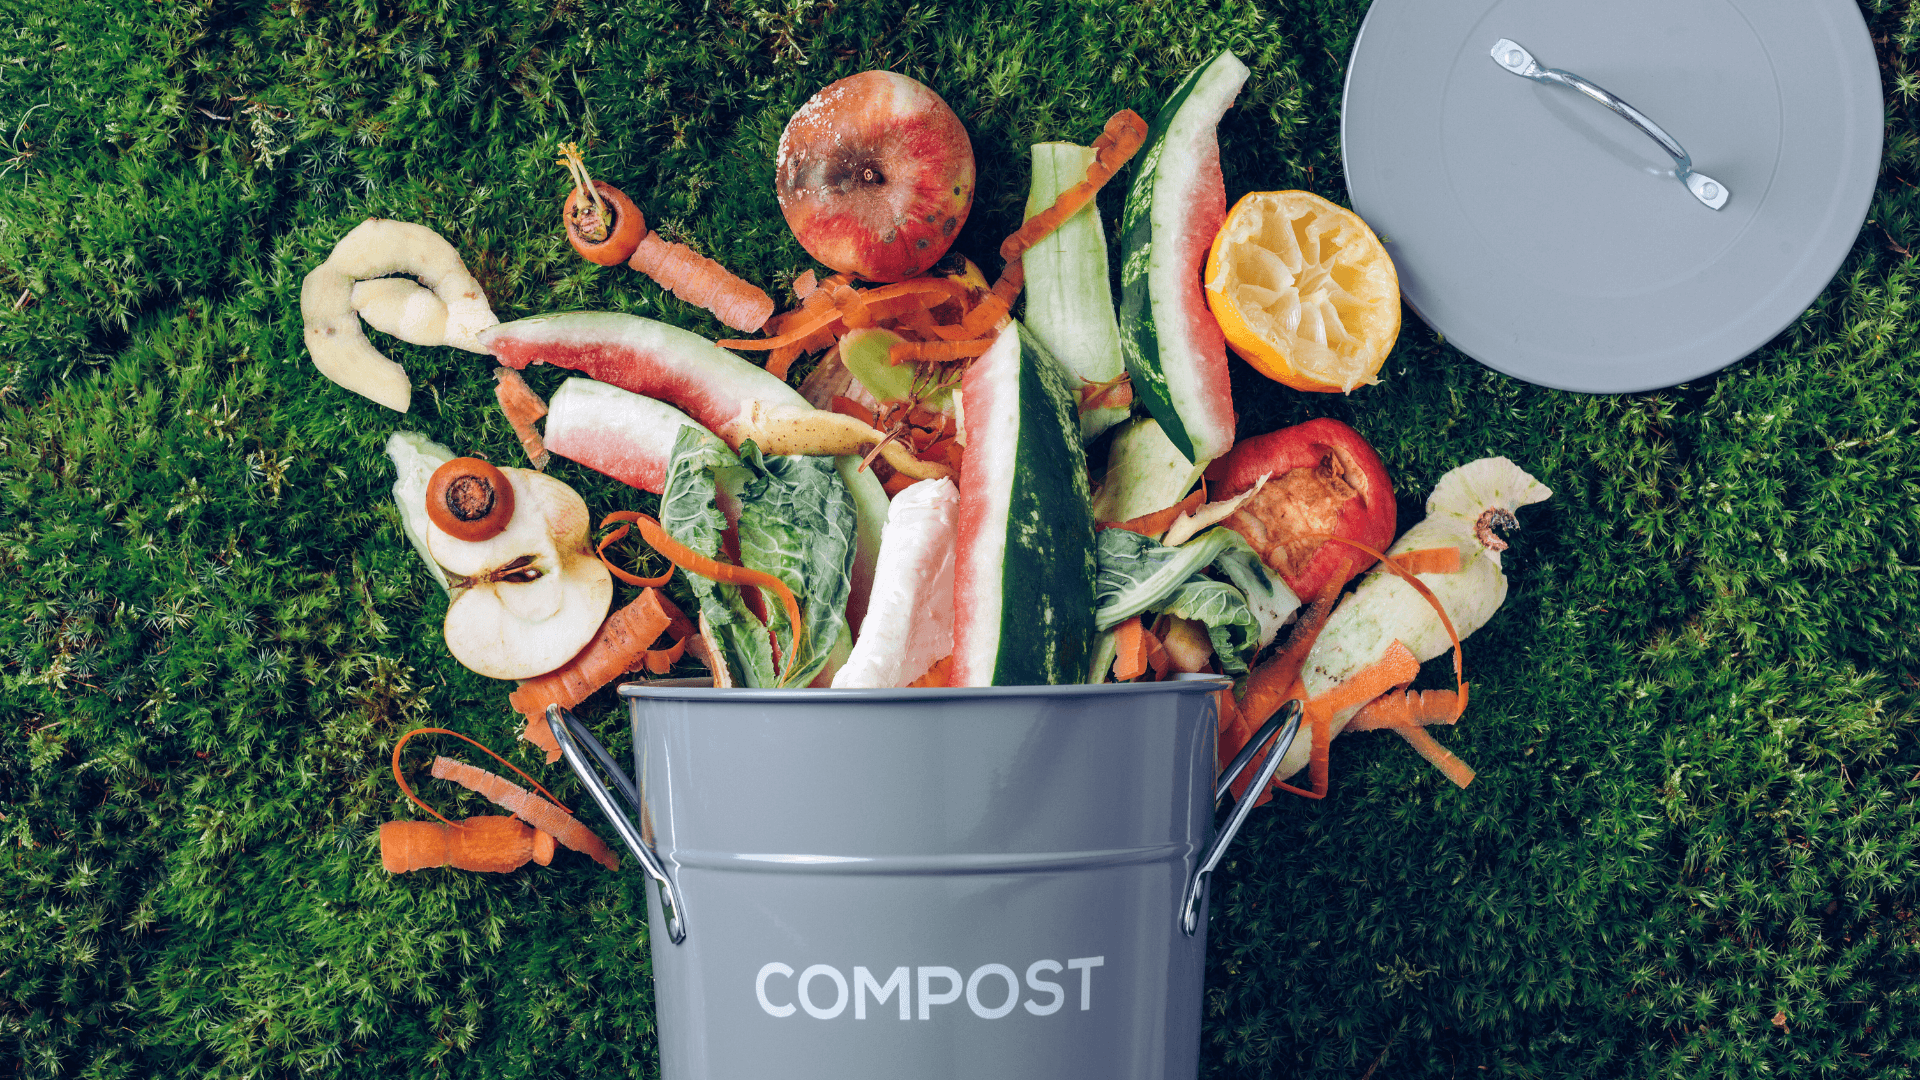
Composting kitchen scraps is an easy way to reduce waste while creating nutrient-rich soil for plants. It involves collecting food leftovers like fruit peels, coffee grounds, and vegetable scraps and letting them break down naturally into compost. This process helps divert organic material from landfills and supports sustainable gardening.
Anyone can start composting with minimal tools or space. Understanding what materials can be composted and how to maintain the right balance of moisture and air is key to success. This guide will walk through the basics to help beginners turn their kitchen waste into valuable compost.
Why Compost Kitchen Scraps?
Composting kitchen scraps transforms organic material into valuable resources rather than letting it become waste. It addresses environmental issues, improves soil quality, and helps manage household waste more sustainably.
Environmental Impact of Kitchen Waste
Kitchen waste contributes significantly to overall household waste, especially food scraps and other organic material. When discarded in landfills, this waste decomposes anaerobically, producing methane, a potent greenhouse gas that impacts climate change.
By composting kitchen scraps, households reduce their carbon footprint and limit methane emissions. Composting diverts organic material from landfills, thereby lowering the release of harmful gases into the atmosphere. This process directly supports efforts against climate change by managing waste more responsibly.
Benefits of Composting for Soil Health
Composting converts food waste into nutrient-rich compost that improves soil structure and fertility. This organic material enhances water retention and promotes healthy microbial activity in soil.
Using compost reduces the need for chemical fertilizers, which can harm the environment through runoff. Soils enriched by compost support plant growth and help maintain long-term agricultural productivity. This makes composting a practical way to recycle nutrients back into the earth.
Reducing Landfill Use and Greenhouse Gas Emissions
Landfills are the primary destination for most kitchen scraps, but overcrowding and emissions are major concerns. Composting lessens the volume of waste sent to landfills, extending their lifespan and reducing environmental impact.
Organic waste in landfills generates methane, which is 25 times more effective at trapping heat in the atmosphere than carbon dioxide. By diverting food scraps to compost bins, households contribute to lowering greenhouse gas levels, helping mitigate the effects of climate change.
What Can and Cannot Be Composted
Composting kitchen scraps requires knowing which materials help the process and which can cause problems. Proper selection balances nutrients and prevents odors or pests.
Compostable Kitchen Scraps
Kitchen scraps like fruit and vegetable peels, coffee grounds, and eggshells are ideal for compost. These items are considered green materials because they are rich in nitrogen, which fuels decomposition.
Yard waste, such as grass clippings and small leaves, also adds valuable green content to the compost pile. Adding these scraps regularly helps maintain active microbial activity.
Eggshells provide calcium but should be crushed first to speed breakdown. Coffee grounds improve texture and add nitrogen. Avoid large chunks that slow down composting.
Items to Avoid Adding
Not all kitchen or organic waste should go into the compost. Dairy products, oily foods, and meat scraps can create foul odors and attract pests.
Pet waste is risky because it may contain harmful pathogens and should never be added. Diseased plants are also a no-go since they can spread illness within the compost and garden.
Processed foods and anything treated with chemicals should be excluded to prevent contamination. Plastics, metals, and glass obviously do not compost.
Balancing Greens and Browns
A healthy compost pile needs a balance of greens (nitrogen-rich) and browns (carbon-rich). Greens include food scraps like fruit and vegetable peels, coffee grounds, and fresh yard waste.
Browns include dry leaves, shredded paper, straw, and other dry plant material. These carbon sources control moisture and odor by absorbing excess water and air.
An ideal ratio is roughly 2 or 3 parts browns to 1 part greens by volume. Too many greens cause slimy, smelly compost, while too many browns slow decomposition. Adjust based on texture and smell.
How to Start Composting Kitchen Scraps
Starting to compost kitchen scraps involves selecting the right method, preparing a proper setup, maintaining conditions for decay, and monitoring the progress of your organic material. Each step affects how efficiently kitchen waste turns into finished compost.
Choosing a Composting Method
The choice of composting method depends on space, waste volume, and time availability. A compost bin or compost pile suits outdoor gardeners who can handle larger amounts of kitchen scraps and yard waste.
For smaller spaces or renters, countertop compost pails combined with vermicomposting (worm composting) provide a compact option. Worms break down scraps quickly in an enclosed container.
Another option is bokashi composting, an anaerobic fermentation process inside a sealed bin. It handles all kitchen waste, including meat and dairy, which traditional methods usually avoid.
Each method requires varying levels of attention. Outdoor bins need regular aeration by turning, while worm bins require monitoring of worm health and moisture.
Setting Up Your Compost Bin or Pile
Choose a location with good drainage and partial sunlight for an outdoor bin or pile. The container should have ventilation holes for airflow to support aerobic decomposition.
For a compost pile, layer organic material starting with coarse materials like twigs or shredded paper to create air pockets.
Add kitchen scraps such as fruit peels, vegetable trimmings, and coffee grounds, avoiding meat, dairy, and oily foods unless using bokashi.
For vermicomposting, prepare a container with bedding like shredded newspaper and add red worms. Keep the bin in a stable temperature range (55°F to 77°F or 13°C to 25°C).
Keep a countertop compost pail for daily scraps to reduce odors and pests, then regularly transfer scraps to the main bin or worm bin.
Maintaining the Composting Process
Maintaining the right balance of ingredients is essential. Aim for a mix of green materials (nitrogen-rich kitchen waste) and brown materials (carbon-rich paper, leaves).
Turn outdoor compost piles every 1-2 weeks to increase aeration and speed decomposition. For worm bins, gently mix bedding monthly to avoid compaction.
Moisture is critical: compost should feel like a damp sponge. Too dry slows decay; too wet causes smell or pests.
Avoid adding large quantities of one type of waste at once. Small, consistent additions are best. Monitor for unpleasant odors, which signal poor balance or excess moisture.
Tracking Decomposition and Moisture Level
Check your compost weekly to assess breakdown and moisture. Visible decomposition includes dark, crumbly organic matter with an earth-like smell.
If the material is still recognizable after weeks, increase aeration or add more brown materials.
Moisture level affects microbial activity. Use a squeeze test: compost is ideal when a handful feels damp but does not drip water.
Add water if it feels dry, or turn and add dry brown materials if overly wet. For worm bins, maintain moisture between 75% and 85% to keep worms healthy.
Finished compost looks and smells like rich soil. It typically takes 2-6 months, depending on conditions and methods used.
Using and Applying Finished Compost
Finished compost is a nutrient-rich soil amendment that improves soil health and supports plant growth. Proper handling and application maximize its benefits, making it a valuable alternative to chemical fertilizers.
How to Harvest Compost
Finished compost looks dark, crumbly, and earthy with no recognizable scraps. It usually takes 2 to 6 months to mature, depending on conditions like temperature and moisture.
To harvest, sift the compost through a mesh screen to remove large particles. These chunks can go back into the compost bin for further breakdown.
Wear gloves when handling finished compost to protect from pathogens. Store it in a breathable container or spread it immediately to avoid nutrient loss.
Applying Compost as a Soil Amendment
Compost can be mixed into garden soil at a ratio of about 1 part compost to 3 parts soil. This improves soil texture, moisture retention, and nutrient content.
For planting beds, spread a 2–3 inch layer of finished compost and till it into the top 6–8 inches of soil. This encourages root growth and increases microbial activity.
Compost can replace or supplement chemical fertilizers, reducing the risk of nutrient runoff. It is slower releasing but provides balanced nutrients and improves long-term soil fertility.
Improving Soil Health and Plant Growth
Adding compost enriches soil with organic matter, boosting beneficial microorganisms that aid nutrient cycling. This leads to stronger plant roots and better resistance to pests and diseases.
Using finished compost as mulch conserves moisture and regulates soil temperature. It also gradually breaks down, releasing nutrients slowly to sustain plant growth.
Regular application promotes soil structure, reducing compaction and erosion. This creates a healthier environment for plants compared to relying solely on chemical fertilizers.

Leave A Comment